Sharing a Google Calendar event is fairly simple at its core. You can either add guests via email directly from the event details or publish the event to get a shareable link. Both methods work well, whether you're coordinating a small team for a meeting or inviting a larger audience to a webinar.
Mastering Event Sharing for Better Collaboration
Sharing a Google Calendar event might seem like a basic task, but understanding its nuances can transform a simple invite into a powerful tool for collaboration. This guide isn't just about the "how" - it's about how to share events in a way that genuinely simplifies coordination with others.
We'll start with the most direct methods, like adding people by email or grabbing a shareable link. More importantly, we’ll explore why getting this right is so crucial for successful event management.
Why Effective Sharing Matters
Think about it: whether you're organizing a key client demo, planning a family gathering, or just trying to align your team, sharing an event correctly cuts through confusion. It ensures everyone has the right information, at the right time, conveniently located in their own calendar.
Here at Add to Calendar PRO, this is our area of expertise. We want to share practical insights that will help you make Google Calendar a more effective tool for your scheduling needs.
Mastering how to share an event in Google Calendar is the first step toward reducing no-shows and improving attendee engagement for any occasion.
With over 500 million monthly active users, Google Calendar is a dominant force in digital scheduling. Its sharing features are designed for teamwork and are essential for anyone who wants to organize events efficiently.
For a deeper dive into all the different strategies, you can always check out our comprehensive guide on sharing Google Calendar events.
Google Calendar Sharing Methods At a Glance
To make it even simpler, here's a quick rundown of the main ways to share an event and when each is most appropriate. It's a handy cheat sheet for choosing the right tool for the job.
| Sharing Method | Best For | Key Feature |
|---|---|---|
| Add Guests via Email | Private meetings, team syncs, and events where you need to track RSVPs. | Guests can accept or decline directly, and their status appears in the event. |
| Publish Event (Public Link) | Public webinars, community events, or any large-scale gathering where you want easy access. | Creates a simple HTML page with event details that anyone with the link can view. |
| Share Calendar | Ongoing projects or team schedules where everyone needs visibility into a collection of events. | Gives people access to an entire calendar, not just a single event. |
Each method serves a specific purpose, and knowing the difference will save you and your attendees a lot of headaches down the line.
Sharing Events From Your Desktop
When you need to fine-tune who can do what with your event, the desktop version of Google Calendar is your best option. It serves as the command center for event sharing, offering the most robust set of controls.
The simplest way to get an event on someone's radar is to add them as a guest via email. When creating or editing an event, just start typing their email address into the "Add guests" field. Once added, they will receive an email invitation, and the event will appear on their calendar (usually grayed out until they RSVP).
But sending the invite is just the beginning. The real power lies in managing what your guests can actually do with that event. This is where guest permissions come into play, and they are incredibly important.
Customizing Guest Permissions
Once you've added a few guests, look for the "Guest permissions" section. This is where you decide the level of control each person has. You can let them modify the event, invite other people, or just see who else is coming.
This handy visual breaks down the different roles within a Google Calendar event.
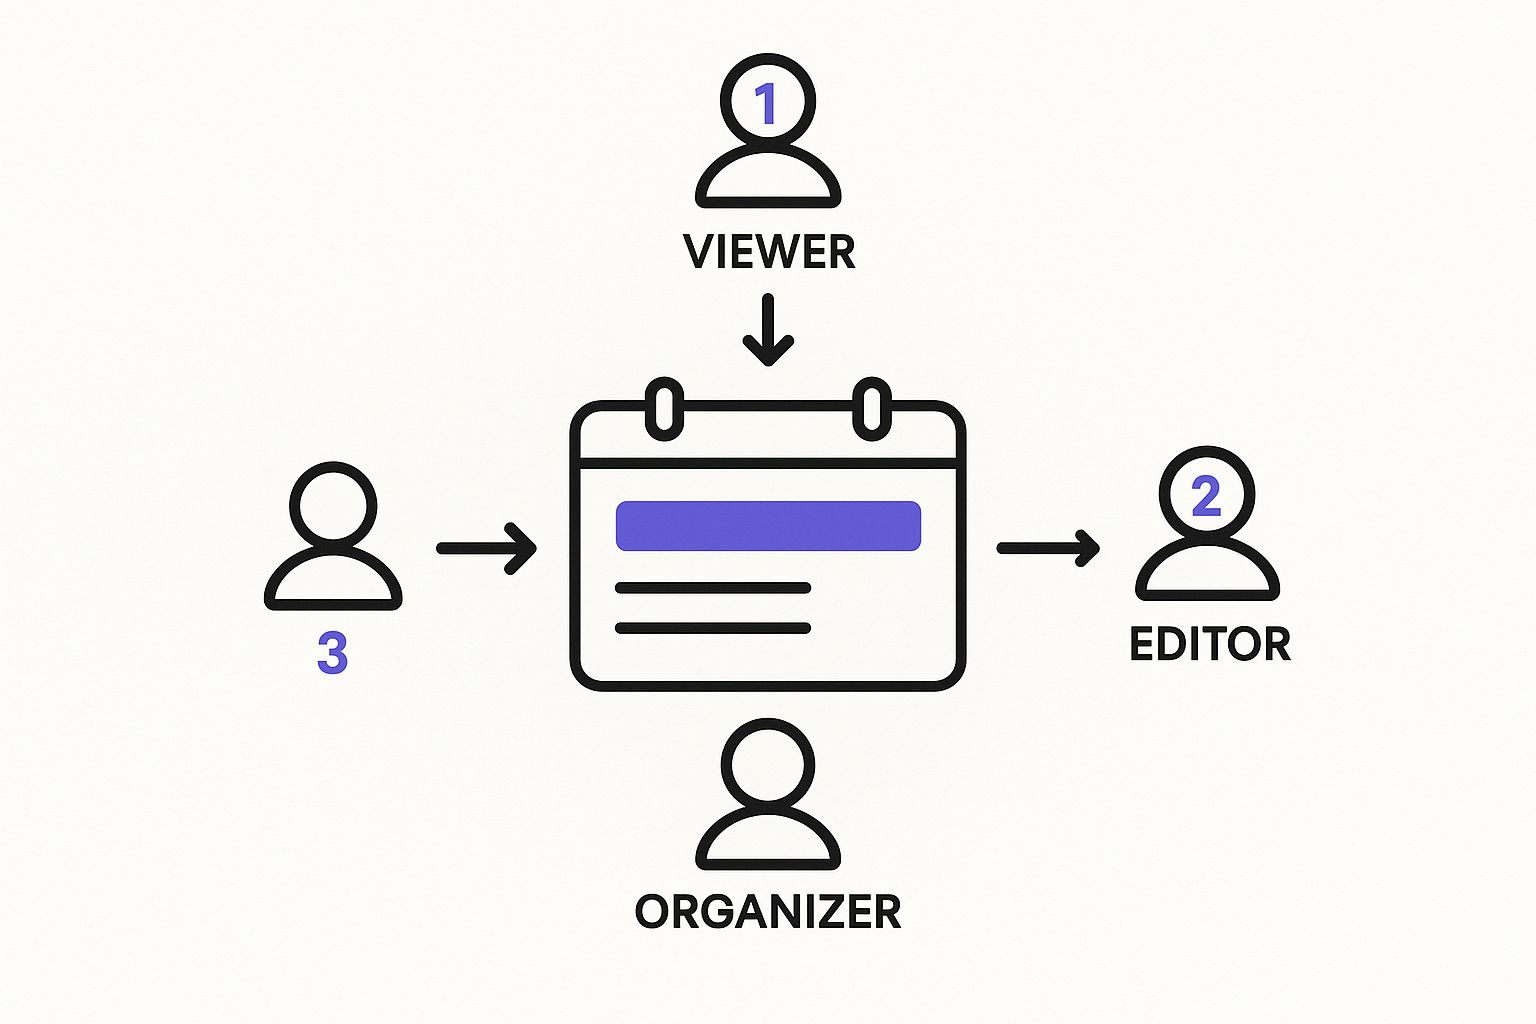
Understanding these roles helps you assign the right permissions for any situation. For example, if you're running a webinar with a co-host, you would likely want to give them permission to modify the event so they can update details as needed. The attendees, on the other hand, just need to see the information.
Consider a recurring team meeting. You might grant a co-organizer the ability to make changes, allowing them to attach a new agenda or reschedule if a conflict arises. But when scheduling a client demo, you'll want to lock it down. Disable all permissions so they have view-only access, preventing any accidental changes to a critical appointment.
Pro Tip: Make it a habit to double-check guest permissions before you hit "Save." Setting the right access from the start saves a lot of potential headaches and keeps you in control of your schedule.
Of course, all this builds on the basics of creating an event in the first place. If you feel a bit rusty, our guide on how to add events to Google Calendar is a great place to brush up. Mastering these desktop permissions is a key step toward sharing events effectively.
Sharing Google Calendar Events from Your Phone

Let’s be honest, a lot of our scheduling happens on the go. Fortunately, the Google Calendar mobile app makes it very simple to share events right from your phone, whether you're using an Android or an iPhone.
The basic process is straightforward. Just open the event you want to share, tap the pencil icon to enter edit mode, and look for the "Add people" option. Enter their email addresses, tap "Save," and Google will ask if you want to send the invitations. It’s perfect for scheduling a quick meeting when you're away from your desk.
Navigating Mobile App Limitations
However, there's a trade-off: the mobile app is streamlined for simplicity, which means it doesn't include the more advanced settings. Specifically, you can't manage granular guest permissions.
From the app, you won’t find the options to control whether your guests can modify the event, invite others, or see the full guest list. For a casual coffee meetup, that's perfectly fine. For a sensitive client meeting? It's less ideal.
Pro Tip: Need full control over guest permissions while you're out and about? There’s a helpful workaround. Just open your phone’s web browser, go to
calendar.google.com, and find the option in your browser’s menu to "Request desktop site."
This trick loads the full-featured desktop version of Google Calendar, giving you access to every single setting you'd have on your computer. It's a lifesaver for managing complex events remotely.
While the mobile app is great for 90% of everyday sharing, knowing how to pull up the desktop site on your phone gives you the power to handle any scheduling situation, no matter where you are.
Understanding Guest Permissions and Privacy
When you're sharing a Google Calendar event, it's important to control who sees what and who can take action. These settings determine exactly what your guests can and can't do, giving you the power to collaborate effectively while maintaining privacy when needed.
Once you start adding people to an event, you'll see a "Guest permissions" section with a few checkboxes. It's wise not to overlook these - they completely change how people interact with your event. Let's get into what they actually mean.
Decoding Guest Permissions
Getting these settings right from the start prevents confusion and keeps you in control of your schedule. Each one has a very specific job.
- Modify event: Ticking this box is like handing over the keys. A guest can change any detail - time, location, description, you name it. This is perfect for a co-organizer who might need to tweak the agenda for a workshop. But for a client meeting where you need the details locked in? You'll want to leave this one unchecked.
- Invite others: This one is quite straightforward. When checked, your guests can forward the invitation to whomever they want. It’s a great way to include more people in an open team brainstorm. For a confidential one-on-one or a private interview, however, you'll definitely want to disable this.
- See guest list: This setting controls whether attendees can see who else is on the invite. For a team lunch, it helps build a sense of community. But for something like a support group meeting where attendee privacy is a top priority, it’s essential to turn this off.
By default, Google often leaves these options enabled. We've found it’s a smart habit to quickly review them every single time you create an event. It’s a two-second check that ensures you're only sharing what you intend to.
Public vs. Private Event Visibility
Beyond individual guest permissions, there’s a broader privacy control: the event's overall visibility. This setting dictates how the event appears to people who have general access to see your calendar but aren't specifically invited to this event.
If you mark an event as "Private", anyone who can view your calendar will just see a solid "Busy" block. No title, no details, nothing. On the other hand, an event set to "Public" or "Default visibility" shows all the details to anyone with viewing access. This is a crucial distinction, especially if you're trying to keep personal appointments private on a shared work calendar.
Sometimes you don't want to manually invite every single person to an event. Imagine sending invites for a public webinar, a community workshop, or a company-wide town hall - collecting dozens, or even hundreds, of individual emails is a significant task.
This is where publishing your event to create a shareable link becomes a real game-changer.
When you publish an event, Google Calendar generates a unique public webpage for it. Anyone with that link can see all the essential details: time, date, location, and the full description. No personal invitation needed. It's the most efficient way to broadcast information to a large audience.
The Upside of Going Public With Your Event Link
Publishing an event is the perfect move when you want to get the word out to as many people as possible with minimal effort.
Think about it. You can just drop the link into your next newsletter, post it on social media, or share it in a community forum. It removes the friction of manual invites and makes your event instantly accessible to anyone who's interested.
Of course, with this accessibility comes responsibility. Remember that "public" means public. Anyone with the link can see the event details, so double-check that you haven't included any sensitive or private information before you hit publish.
At Add to Calendar PRO, we’ve seen firsthand how making events easily accessible drives engagement. A public link is the first step, but the next is ensuring people actually remember to attend.
This is where a simple "Add to Calendar" button becomes so powerful. While your public Google Calendar link lets people view the event, a dedicated button lets them add it straight into their own personal calendar with a single click. That one small action can make a massive difference in your attendance rates. Our service is built around perfecting this process, creating universal buttons that work flawlessly for everyone, no matter what calendar app they use.
You can even take these links a step further for better tracking and attendee management. If you're looking to not only share your event but also get a headcount, check out our guide on how to create an RSVP link.
Still Have Questions About Sharing Events?
Even with a step-by-step guide, it's completely normal for questions to pop up when you're trying to share an event from your Google Calendar. Let's walk through some of the most common ones we hear from users so you can get unstuck and back to your day.
"Why can't my guests edit the event I invited them to?"
This is a classic issue, and it almost always comes down to permissions. When you first invite someone, Google Calendar defaults to giving them view-only access. It’s a safety feature, but it can be confusing.
To fix it, you have to use a desktop computer, open the event, and find your guest list. Next to each person's name, you'll see a few checkboxes. Just tick the one for "Modify event," and they'll be able to make changes.
"Can I share just one event without showing them my whole calendar?"
Absolutely! This is a core feature of how Google Calendar sharing works. When you invite someone to a specific event, that's all they can see. The rest of your schedule - your doctor's appointments, your lunch plans, everything else - remains completely private, protected by your main calendar's settings.
Understanding Your Sharing Options
Many people ask for the easiest way to create a simple link that anyone can use to add an event to their calendar. Google has a "Publish event" feature that creates a basic link, which is one way to achieve this.
For something more universal and professional, especially for websites or email campaigns, our service generates "Add to Calendar" links that work seamlessly with Google, Outlook, Apple Calendar, and more.
What's the real difference between adding a guest and making an event public? It's all about control. Adding guests sends a direct, trackable invite to specific people. Making an event public creates a URL that anyone can use, which is much better for broadcasting an event widely.
Finally, it’s useful to see how this all stacks up against other calendars. The way Google Calendar handles invites is quite similar to Microsoft Outlook Calendar; both let you add guests by email and set their permission levels. What neither of them does, though, is automatically sync that event if you copy it to another one of your own calendars. For that, you’d need to do it manually or use a third-party tool.
If you want to dive deeper into the nitty-gritty, you can explore more about how calendar platforms differ on syncthemcalendars.com.
For a seamless way to create, share, and track your events with universal "Add to Calendar" buttons, check out Add to Calendar PRO. Learn more at https://add-to-calendar-pro.com.